

You can now describe a 3D scene in plain English and have it built inside Blender. Claude Code, Anthropic's AI agent, connects to Blender through a free add-on and writes the Blender Python for you: models, materials, lights, cameras and animation.
The connection gives Claude hands inside Blender. A second free download, the Blender Skills pack, gives it the habits of a 3D team: 94 skill files that spell out how a character artist, a lighting artist or a game export specialist would approach the job. This guide sets up both on a Mac or a Windows PC, then shows you what to ask for first.
Short answer: install Claude Code, run the one-line MCP for Blender installer (it adds the add-on to Blender and connects Claude Code), start the server from Blender's sidebar, copy the Blender Skills folder into your project, and describe what you want.
- Blender, the MCP for Blender add-on (formerly BlenderMCP) and the Blender Skills pack are all free.
- Claude Code itself needs a paid Claude subscription or an Anthropic Console account.
- The Blender Director skill plans every job first, then hands each step to a specialist skill.
- Save your Blender file before you start. The add-on lets Claude run any Python inside Blender.
What you are setting up
Two free projects, made by two different people, do the work together.
- MCP for Blender by Siddharth Ahuja (MCP for Blender on GitHub). It was called BlenderMCP until its package was renamed, and the old name still works. It is a Blender add-on plus a small server. The add-on opens a connection inside Blender on your own computer, and the server lets Claude Code use it. Through it, Claude can run Blender Python, read the scene, look at the viewport or a render to check its own work, and pull assets from Poly Haven, Sketchfab and Poly Pizza. It had about 33,600 stars on GitHub when we checked on 8 November 2026, and it is MIT licensed.
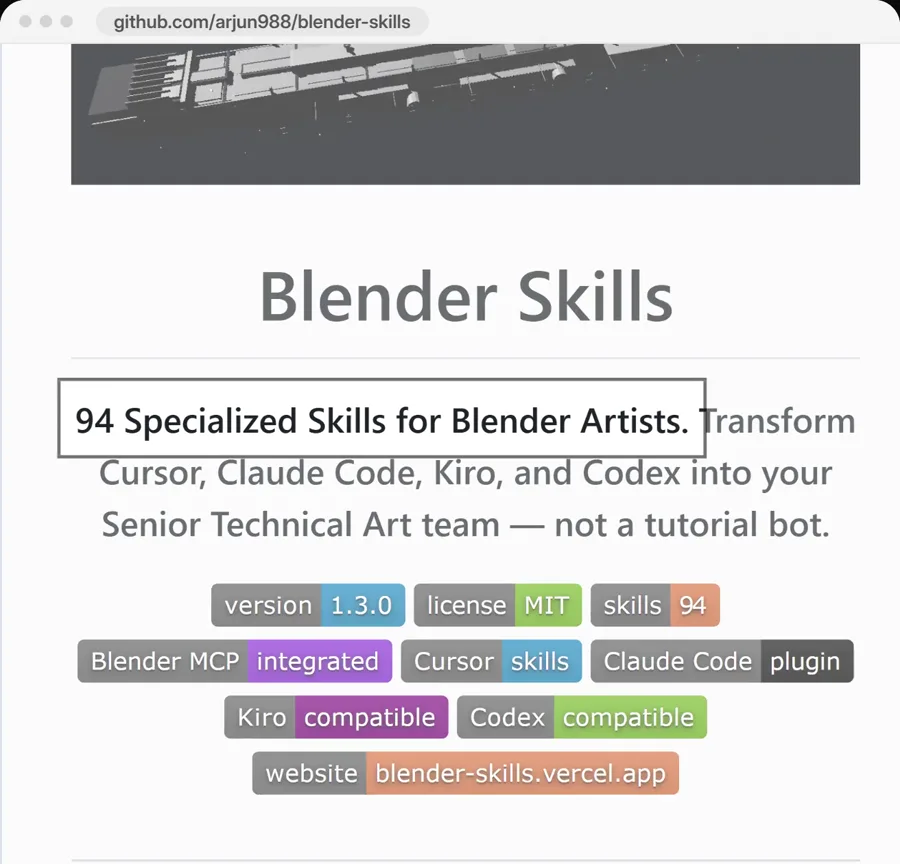
- Blender Skills by Arjun Shukla (Blender Skills on GitHub). It is a pack of 94 skill folders, each with a SKILL.md file of instructions, plus more than 175 reference files on pipeline standards, naming, MCP tools and checklists. Version 1.3.0 had about 2,200 stars on the same day. Also MIT licensed.
MCP stands for Model Context Protocol, the standard way to plug a tool into an AI agent. A skill is a folder of instructions that Claude Code reads when a task calls for it. So the add-on lets Claude act in Blender, and the skills tell it how a professional would plan and check that work.
The pack also works with Cursor, Kiro and Codex, and the add-on works with Claude Desktop, Cursor, Codex, VS Code and other MCP apps. We use Claude Code here because the skills were written for its folder layout.
Before you start
- Blender 3.0 or newer. It is free from blender.org. The current release is Blender 5.2.
- Claude Code with a paid Claude subscription or an Anthropic Console (API) account. Anthropic's docs say most Claude Code surfaces need one of the two.
- uv, a free tool that runs Python apps. The add-on's installer sets it up if you do not have it. The add-on needs Python 3.10 or newer, and uv can fetch that too.
- Git, to download the skill pack. You can also download the pack as a ZIP from GitHub.
- One project folder for your 3D work. Claude Code loads skills from the folder you start it in, so keep the pack and your prompts there.
You do not need to know Blender to follow this guide. Knowing where the viewport and the sidebar are helps when you want to check or adjust what Claude made.
Step 1: Install Claude Code
- Open a terminal. On a Mac that is the Terminal app. On Windows, open PowerShell (you do not need to run it as administrator).
- Run Anthropic's official installer for your system, shown below. It shows no progress while it downloads, so give it a moment.
- Open a new terminal window and type
claude --version. A version number means it worked. If the command is not found, the install folder is not on your PATH yet, and Anthropic's install troubleshooting page has the fix. - Go to your project folder (
cdfollowed by its path), typeclaude, and sign in with your Claude account when asked.
curl -fsSL https://claude.ai/install.sh | bashThat one is for Mac and Linux. In Windows PowerShell, use this instead:
irm https://claude.ai/install.ps1 | iexHomebrew (brew install --cask claude-code) and WinGet (winget install Anthropic.ClaudeCode) work too. Homebrew installs do not update themselves, so run brew upgrade claude-code now and then.
Step 2: Install the Blender add-on and connect it to Claude Code
The add-on has a one-line installer that does three jobs. It installs uv if needed. It finds the AI apps on your computer and adds a blender entry to the ones you pick. Then it copies the add-on into Blender and turns it on. It keeps a backup copy of every settings file it changes.
- Close Blender if it is open.
- Run the installer for your system, shown below.
- When it lists the apps it found, pick Claude Code.
- Fully quit Claude Code and start it again, so it picks up the new server. On Windows, also quit any Claude app from the system tray.
curl -LsSf https://www.mcp-for-blender.com/install.sh | shOn Windows, in PowerShell:
irm https://www.mcp-for-blender.com/install.ps1 | iexIf you would rather not run a script, or Windows Defender blocks it, install uv first (winget install --id=astral-sh.uv -e on Windows, brew install uv on a Mac), open a new terminal, and run uvx mcp-for-blender setup. That runs the same setup without the script.
To do every part by hand, add the server to Claude Code and copy the add-on into Blender with these two commands:
claude mcp add blender uvx mcp-for-blender
uvx mcp-for-blender install-addonThen open Blender, go to Edit, Preferences, Add-ons, search for MCP for Blender, and turn on Interface: MCP for Blender. If it does not show up, restart Blender, or click Install and pick the copied add-on file.
Step 3: Start the connection inside Blender
- Open Blender. The add-on starts its server when Blender opens.
- Hover over the 3D viewport and press N to open the sidebar. Click the MCP for Blender tab.
- If the server is not running, click Start MCP Server. Tick only the asset libraries you want Claude to use. Poly Haven, for example, downloads models, textures and HDRI lighting files to your computer.
- In Claude Code, type
/mcp. You should see a server called blender in the list. - Test it with a plain question: What is in my Blender scene right now? In a fresh file, Claude should find Blender's default cube, camera and light.
If the first request fails, send it again. The add-on's own notes say the first command sometimes does not go through and works after that. Do not start the server yourself by typing the uvx command in a terminal. Claude Code starts it when it needs it.
Step 4: Add the Blender Skills pack
The add-on gives Claude the controls. The pack gives it a way of working. Run these in a terminal, inside your project folder:
git clone https://github.com/arjun988/blender-skills.git
mkdir -p .claude/skills
cp -r blender-skills/.claude/skills/* .claude/skills/On Windows, in PowerShell:
git clone https://github.com/arjun988/blender-skills.git
New-Item -ItemType Directory -Force .claude\skills
Copy-Item -Recurse -Force "blender-skills\.claude\skills\*" ".claude\skills\"- Restart Claude Code from the same project folder, so it loads the new skills.
- Ask it: Which Blender skills can you see? It should name blender-director and the specialist skills, like hard-surface, lighting and export-pipeline.
- If it sees none, check that the folders sit in
.claude/skillsinside the folder you started Claude Code from, not one level deeper.
You can also hand the whole setup to Claude. Paste this into Claude Code with Blender open, and it will walk you through the clicks it cannot do itself:
Set up Blender Skills for me so you can work in Blender.
1. Install uv if I do not have it.
2. Help me install the free BlenderMCP add-on in Blender and connect it to you. Follow its README: https://github.com/ahujasid/blender-mcp
3. Clone https://github.com/arjun988/blender-skills and copy its .claude/skills folder into this project.
Tell me when I need to click something in Blender, and tell me when to restart you.Prefer a one-click copy? The same prompt is on our free Blender skills page.
Step 5: Describe your first scene
Start with one object or one small scene, not a whole game level. Say what it is, the style, and where it is going (a render, a website, a game engine). The more specific the brief, the better the plan the Blender Director writes.
A few prompts to try. The first comes from the pack's own examples, the second and third from the add-on's:
Build a game-ready sci-fi rifle for Unreal Engine, 3k tris, realistic PBRCreate a low poly scene in a dungeon, with a dragon guarding a pot of goldMake the lighting like a studio, then point the camera at the scene and make it isometricWhat happens next: the Director reads your request, picks a pipeline, writes a short plan, and calls the specialist skills one after another. Through the add-on, Claude runs Blender Python, then uses its look tool to view the result from the camera or several angles and fix what is off. Expect it to ask for a decision now and then, like a polygon budget or a style.
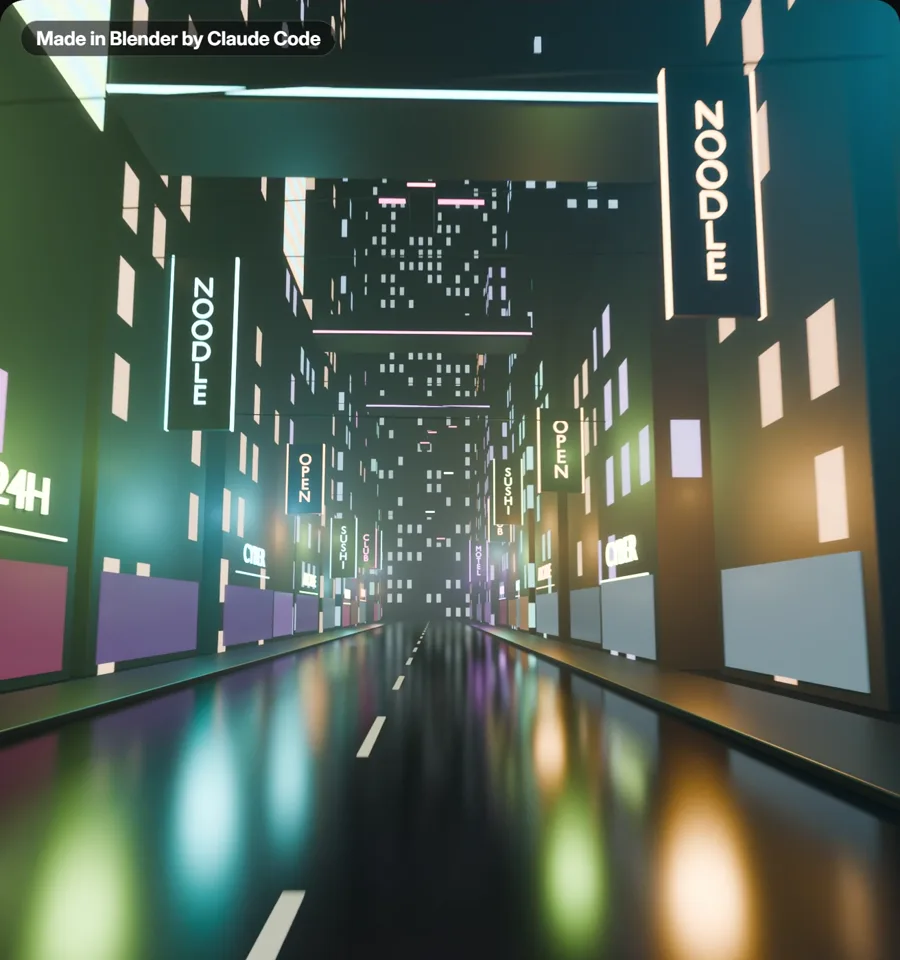
For that test, Claude Code read the pack's director, world, lighting, materials, hard-surface, character, animation, camera and rendering skills, wrote a plan at the top of one Blender Python script, and built a neon street and a small waving robot. We ran that script in Blender 5.2 directly rather than through the add-on, which runs the same kind of Blender Python inside an open Blender. The 181-frame robot animation rendered in about 73 seconds with Blender's Eevee engine. No AI image or video model was involved.
How the Blender Director runs a job
The Director's own file has a hard rule: never skip planning. It moves through analyse, plan, brief, delegate, execute, validate and deliver, and the pack's README lists the routes it takes for common requests:
| You ask for | The skills it chains |
|---|---|
| A hero prop, like a game-ready rifle | hard-surface, uv-workflow, materials, asset-optimization, export-pipeline |
| A game character | character-artist, sculpting, retopology, uv-workflow, texture-workflow, rigging, animation, export-pipeline |
| A horror environment | horror-style, environment-artist, lighting, lowpoly-style, asset-optimization, export-pipeline |
| A modular level kit | environment-artist, geometry-nodes, uv-workflow, texture-workflow, asset-optimization, export-pipeline |
You can also attach a photo or concept art and ask Claude to match it. The reference-image route matches the camera first, then builds the geometry in tiers, adds materials and lighting, and compares screenshots against your reference in a loop.
Beyond the core skills, the pack carries style skills (low poly, anime, voxel, isometric, stylized, realistic, plus extended looks like pixel art, noir and hand-painted), world and mood skills (fantasy, sci-fi punk, cozy, brutalist) and genre direction skills for shooters, RPGs, racing games and more. Name the style in your prompt and the Director pulls in the matching skill.
Exporting to Unity, Unreal or Godot
The pipeline skills matter most for game work. There are skills for asset optimization, levels of detail (LOD), collision shapes, a general export pipeline, and separate exports for Unity, Unreal and Godot, with a QA review skill that checks the result before delivery.
- Name the engine and a budget in the request: export this chair for Godot, under 2,000 triangles.
- Let the Director run the optimization and QA steps before the export. Skipping them is how you end up with oversized files or missing collisions.
- Open the exported file in your engine and check scale and orientation first. Those are the two things most likely to be off between Blender and a game engine.
Where the 3D assets come from
Claude does not have to model everything from scratch. The add-on's asset tools search and import Poly Haven HDRIs, textures and models, Sketchfab models and Poly Pizza low-poly models. Its generate_3d tool can create a model with Tripo, Hunyuan3D, Hyper3D Rodin or Meshy and import it straight into the scene.
- Turn on only the libraries you need in the add-on's sidebar panel. Each one adds downloads.
- The AI model generators need your own API keys for those services, or the add-on's paid Premium option, which runs them without your own keys.
- Check each downloaded model's licence before you use it in paid work. Free libraries and marketplaces do not all use the same terms.
What it costs
| Piece | Price |
|---|---|
| Blender | Free |
| MCP for Blender add-on | Free (MIT). Optional paid Premium for AI model generation without your own keys |
| Blender Skills pack | Free (MIT) |
| Claude Code | A paid Claude subscription, or pay-as-you-go API usage through the Anthropic Console |
| 3D model generators (Tripo, Meshy and others) | Each service's own pricing, only if you use them |
Big scenes take many steps, and every step uses Claude. If you are on a subscription with usage limits, start with small objects and grow the scene, rather than asking for a whole city in one go.
Limits and safety
- Save your work first. The add-on's
execute_blender_codetool runs any Python inside your open Blender. Its own documentation warns to always save before using it. - Run one MCP server at a time. The add-on's notes say not to connect two AI apps to Blender at once.
- Break big jobs up. Long, complex requests can time out. Ask for the layout first, then materials, then lighting.
- Keep it on your own computer. The add-on listens only on your machine by default. Its remote option has no password or encryption and lets the other side run Python in Blender, so leave it off unless you trust the network.
- Telemetry. Sending your content to the add-on's author is off unless you opt in. A minimal anonymous usage record (tool names, success, timing, versions) is sent by default, and there is a tool to switch it off.
- No demo gallery. The skill pack has no before-and-after examples of its own, so judge it on your first few small jobs.
Troubleshooting
| Problem | What to do |
|---|---|
blender is missing from /mcp | Fully quit and restart Claude Code. If it is still missing, run uvx mcp-for-blender setup again, or add it with claude mcp add blender uvx mcp-for-blender. |
| Claude says it cannot reach Blender | Open Blender, press N, open the MCP for Blender tab and click Start MCP Server. Then send the request again. |
| The first request fails, the second works | That is a known quirk of the add-on. Nothing to fix. |
| Timeout errors | Split the request into smaller steps. |
| Blender freezes during an asset download | Downloads run on Blender's main thread, so it waits for the file. Ask for 1k or 2k textures unless the object sits close to the camera. |
| Claude ignores the skills | Check that the skill folders are in .claude/skills in the folder you started Claude Code from, then restart it. |
| An older setup uses the blender-mcp name | It still works. To move to the new name and update the add-on, run uvx mcp-for-blender@latest update, then restart Claude Code and Blender. |
Who this is for, and when to pick something else
This setup suits founders, marketers and creators who need product renders, simple mockups, short animations or a game prototype and do not have a 3D artist on call. It also suits Blender users who want the boring parts handled, like naming, UV unwrapping, optimization and export.
It is a poor fit if you need exact, engineered parts (use CAD software), a hero asset on a hard deadline with a guaranteed look (hire a 3D artist), or you have no paid Claude plan. If you only need one standalone model, a generator like Meshy or Tripo on its own can be faster. If you already use Cursor, Kiro or Codex, the same pack and add-on work there too.
For ad creative, a fast 3D draft is a good way to test an idea before paying for a full render. If you want help turning drafts like these into finished ads, that is part of our creative production work.
Frequently asked questions
Can Claude Code actually control Blender?
Yes. With the free MCP for Blender add-on (formerly BlenderMCP), Claude Code can run Blender Python in your open Blender, read the scene, view the result from the camera or several angles, and import assets. You describe what you want and it builds it in the scene.
Is it free to use Claude with Blender?
Blender, the MCP for Blender add-on and the Blender Skills pack are free. Claude Code is not: it needs a paid Claude subscription or an Anthropic Console account with API credits. AI model generators like Meshy or Tripo charge separately if you use them.
Do I need to know Blender to use this?
No, you can set it up and get results by describing what you want. Knowing where the viewport and sidebar are helps you check the result and make small changes yourself.
What is the difference between BlenderMCP and MCP for Blender?
They are the same project. BlenderMCP was renamed MCP for Blender, and its package is now mcp-for-blender. Old setups that use the blender-mcp name keep working, and uvx mcp-for-blender@latest update moves them over.
Does it work with Claude Desktop instead of Claude Code?
The add-on works with Claude Desktop and other MCP apps. The Blender Skills pack is written for agents that load skill folders, like Claude Code, Cursor, Kiro and Codex, so use one of those to get the Blender Director and the specialist skills.
Is it safe to let Claude run code in Blender?
It is safe enough on your own computer if you save your work first, because the add-on can run any Python inside Blender. Keep the add-on listening only on your own machine, and do not turn on remote connections on a network you do not trust.
Sources
- MCP for Blender (formerly BlenderMCP) README, checked 8 November 2026
- Blender Skills README and the Blender Director skill, checked 8 November 2026
- Blender Skills documentation site
- Claude Code setup docs and overview (install commands, plan requirement)
- Blender download page (current version)